|
Loss of the Ship 6. THE BRITANNIA BRIDGE & CHEESE ROCK
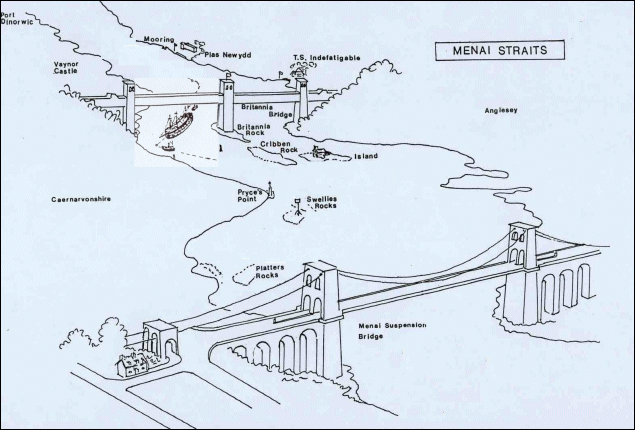
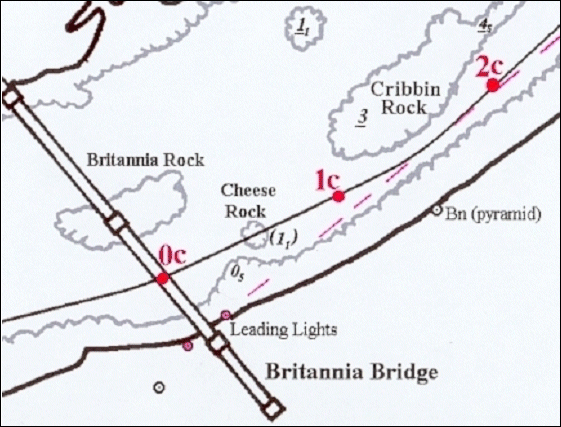
The headmaster, Captain Goddard and the rest of his party were by now standing on the main Holyhead-Menai Bridge road waiting for their first sight of the ship as she cleared Britannia Bridge (there is still a lay-by on the A5 at this vantage point today, although over 50 years of tree growth limits the view they would have had). The Headmaster's timings are a little out but he recalls: "The old ship came under the bridge a little ahead of time, like a stately dowager preceded and followed by alert young pages. We stood, filled with a mixture of pride and apprehension."[6] It is interesting that he, like the Pilot,[4] thought them a little early. The alert young pages were of course the ship's small boats towing the cutters. This was the critical part of the transit. Timings had all been calculated to give them sufficient depth of water over Cheese Rock for the ship to clear it safely. That morning's soundings of the ship had shown a draft aft of 21 feet 10 inches. They needed at least that depth of water over Cheese Rock, plus a safety margin. They moved out from under the Britannia Bridge at point 0c. Cheese Rock lay directly in their path just 300 yards ahead. Cheese Rock was cleared without incident. It must have seemed as if all the careful planning had been vindicated. 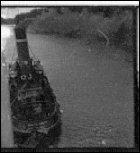 The photo above shows that the forrad tug had moved to the ship's starboard (right) side as a result of the manoeuvre to cross the Strait and enter the Swellies. Price's Point in the distance is directly over her stack. They were now approaching point 1c on the above chart and had to make a slight adjustment to port (the left) in order to pass through Cribben Gutter. The photo below shows the tug starting to move to the left to achieve the desired course adjustment. The movement is confirmed by the gap opening between Price's Point and the tug's stack.
|
||
| Page Last Modified (D/M/Y): 5/1/05 |