|
Loss of the Ship 9. APROACH TO THE SUSPENSION BRIDGE
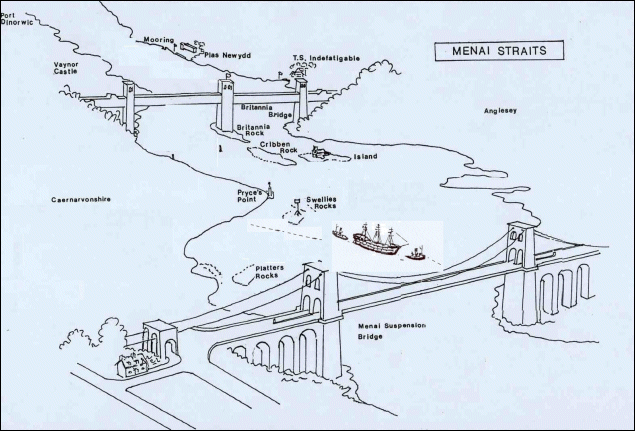
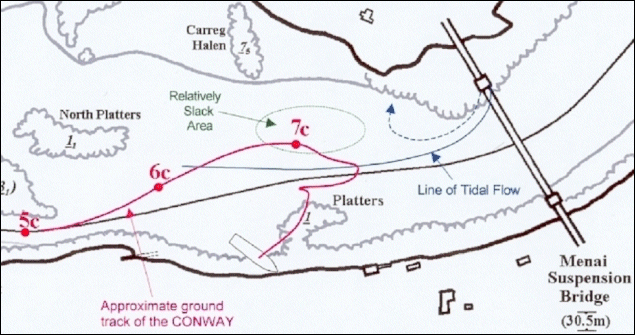
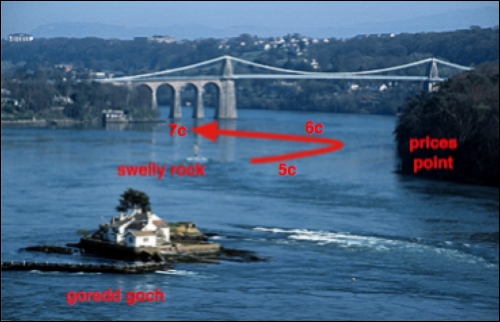
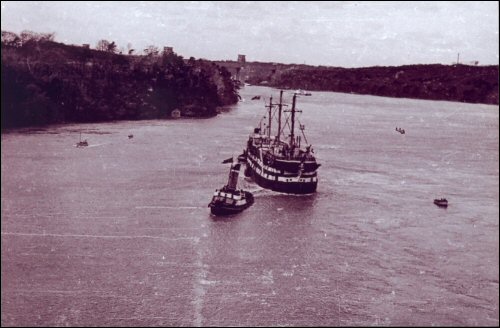
To understand what happened next please refer to the chart below.
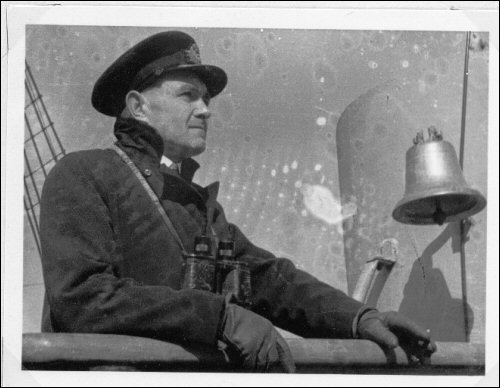
It was approximately 9.45 am. The ship was now just ahead of the point marked 5c and barely making progress against a growing stream. Captain King observed "We were caught in the worst part of the channel with nowhere to go"[7]. From Swelly Rock "the prudent navigation demands that the ship should haul to the northward in order to get on an offing of the Platters before making for the centre of the suspension bridge"[4] i.e. she should follow the route of the black line on the chart. However that would have kept her in the middle of the strengthening stream. The point marked 7c shows that where the main course of the stream moves away from the Anglesey shore there an area of relatively quieter water, marked "Relatively Slack Area" on the chart. Pilot Jones junior on the forward tug realised that if they headed off towards the Angelsey shore - through point 6c, towards the "Relatively Slack Area" they would avoid the worst of the current and at least be able to make some forward progress.
He took the initiative and guided them forward into this (relatively) slower moving water[2]. On the Suspension Bridge "observers noted what they remarked to be a sheer to port (the ship's left)"[4]. The Inquiry thought this was a natural aligning for the Suspension Bridge, in reality it was Jones junior taking the initiative. They continued making very slow progress towards point 7c. By 10am they were abreast the Platters and really could go no further in the calmer water. Very soon they would have to pull out into the main stream to get back into the channel under the Suspension Bridge. The pilots knew that if they headed off towards the Angelsey shore - through point 6c, towards the "Relatively Slack Area" they would avoid the worst of the stream and at least be able to make some forward progress. On the Suspension Bridge "observers noted what they remarked to be a sheer to port (the ship's left)"[4]. The Inquiry thought this was a natural aligning for the Suspension Bridge, in reality it was a deliberate deviation. They continued making very slow progress towards point 7c. By 10am they were abreast the Platters and really could go no further in the quieter water.
|
||||||||
| Page Last Modified (D/M/Y): 5/1/05 |