| |
Loss of the Ship
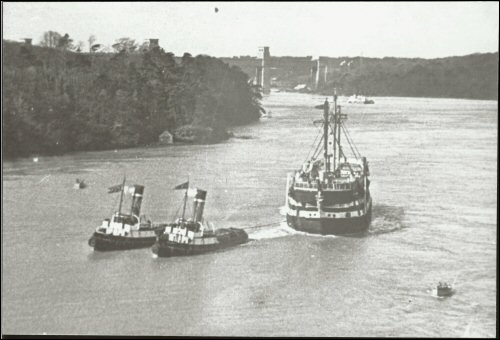
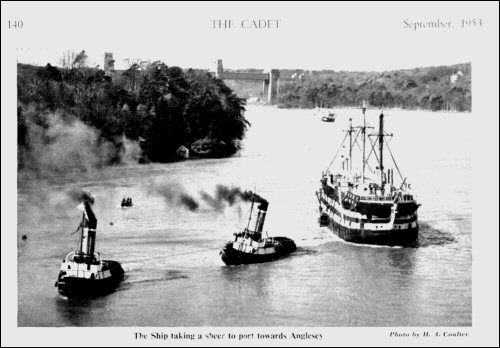
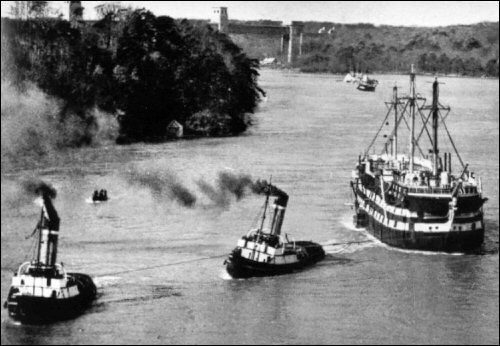
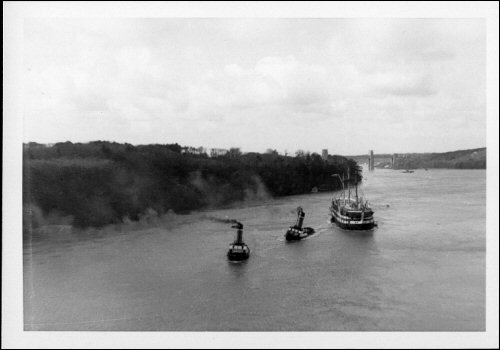
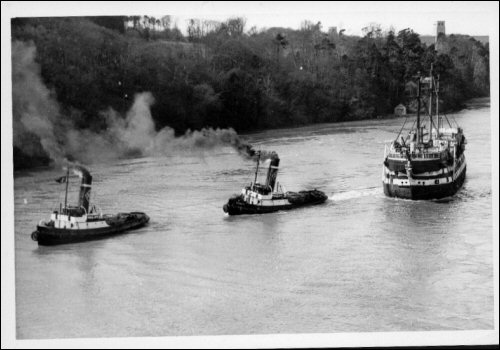
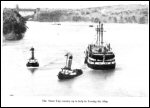
10. BEFORE THE SUSPENSION BRIDGE
The tug moved Conway out of the area of
slack water, across the line of tidal flow and back into the increasing
stream as shown by the red line from point 7c on the chart. Back out
in the stream conditions were dramatically different to those expected
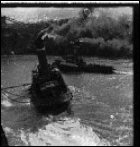
just a few hours before. Captain Miller told the Inquiry "it was
not a true tide, but just a swift moving, confused mass of water".
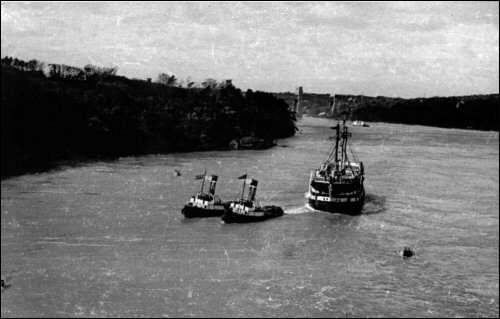
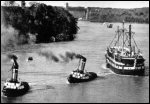
This is very evident in many of the clearer photographs. Unnamed observers
ashore spoke of "something in the nature of a tidal bore as Conway
took her final sheer"[4].
From 0923 to 1010 Conway had only made good
6 cables over the ground, which is barely half a knot[1].
The tugs were clearly fighting a losing battle. They were only a hundred
yards or so from the Suspension Bridge[7] but they could
make no more headway. The Inquiry confirmed, "Conway was not now
moving"[4]. The head tug could not take her forward
and with the stream surging faster and faster and becoming more turbulent
it would not be able to hold her either. It would also be extremely
difficult to have tried to reverse out the way they had just come.
At 9.54 am[12]
with the pilot's concurrence Captain Hewitt ordered the stern tug let
go and sent forward to assist[4]. Captain King recalls that
"a breathless messenger arrived from the poop deck instructing us to
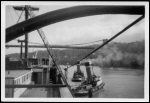
let go"[7]. He and his small working party now had a Herculean
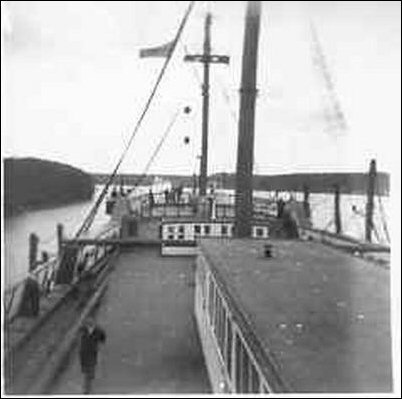
task [7 and 8]. They were faced with a 12' towing spring
and a 4" towing wire wrapped nine times around the mizzenmast. These
had been drawn very tight by the constant tension from the stern tug.
Best option was for the tug to cast off from her end, but communications
with her had become difficult. In the event the stream proved so strong
that the tug found it impossible to come astern sufficiently for her
slip hook to be knocked out. The confined space of the sick bay (only
6 feet headroom) was now a very dangerous place to be with the tow hawsers
"drawn bar-tight". It took "a prolonged struggle"
to free two turns of just the top wire. "It became obvious that
the tug would have to slip the wires if we were not to take all day
and risk life and limb".
Eventually, in desperation, King ordered most
of the working party out of the sick bay and a few of them attacked
the wires with axes. "At last we managed to cast off, the last turns
smashing the sick bay to match-wood as they flew clear through the gun
port" but fortunately not injuring any of the cadets present. The
Rea Towing Company were later to submit a claim for wires and springs
lost including various lengths "retained on stern mooring deck of
Conway when tug slipped"[5].
|
|
At 10.10 am[12]
the stern tug was finally let-go. The Minegarth had a top speed
10 knots, but after letting-go she had to complete a 180� turn.
Despite her power she ended up 400 feet astern of Conway, (Stern
tug Skipper Duff: "She was going every ounce she could
go but still going astern")[4] but then gradually
managed to claw her way past to make fast ahead of the ship. Time
was slipping by while the tidal conditions were getting worse.
Captain King believes it took about 20 minutes to slip the tug.
From their distant vantage point on Anglesey,
Headmaster Browne and his party watched: "We saw her pass
the the first of the danger points, the Swelly Rock, and approach
the Platters; then I spoke my relief to Watson. "...what should
we have done if she had grounded?" As I spoke we all sensed that
something was going wrong. The procession had slowed down. Then
we were not sure if it was moving at all... "She's touched" someone
said."[6]. (In fact at that point she hadn't.
Ed) Seeing the stern tug free herself from Conway, the party jumped
into their cars and drove the short distance to the Suspension
Bridge.[6]
|
|
|
Skipper Duff in Minegarth
reported to the Inquiry "Under the strong tidal conditions
prevailing it would have been impossible to place "Minegarth"
under the bluff bow of Conway in a position to pass or receive
a towing line directly from the ship, and likewise impossible
for the crew of the ship, owing to her design, to make a speedy
connection through the small hawse holes half way down her bows".[5]
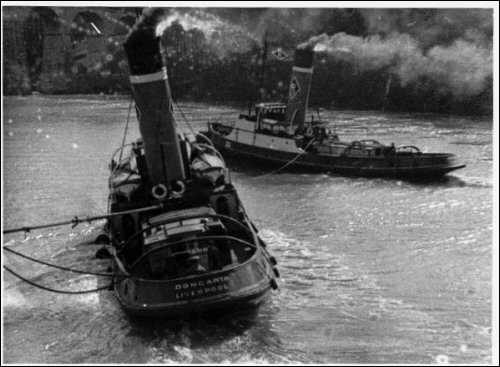
Dongarth was secured on the starboard (right) bow but no provision
had been made to facilitate any second tug securing on the port
(left) bow. The possible need for a second tug forrad had been
discussed at the final planning meeting but those present had
decided it would not be necessary and so no provision was made.[4]
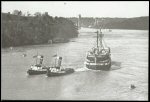
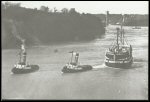
Captain Mcmanus takes up the story, Minegarth
"therefore decided to go ahead of the forward tug and attach
a line to her and tow in line ahead of her. Such an unusual procedure
is fraught with danger, and was a plainly desperate measure. She
passed a 6" rope to the Dongarth and the Dongarth passed her new
8" rope to the Minegarth. With the two tugs towing in tandem the
Dongarth, with taut lines to the Minegarth ahead of her and an
equally taut line to the Conway astern, found her manoeuvrability
seriously restricted"[1]. The Inquiry considered
"The manoeuvre was brilliantly executed"[4]. However
the ship had lost some ground as shown by the red line on the
chart falling back from the Suspension Bridge.
|

|
|
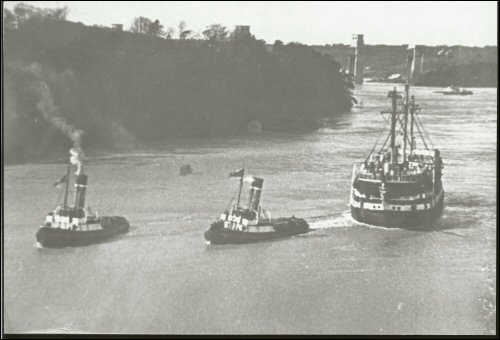
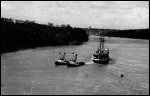
Shortly before 10.20am
Minegarth took up the strain ahead of Dongarth and the combined
efforts of the two tugs produced a slight but noticeable headway
towards the Suspension Bridge.
Nor was the increasing rate of the stream
their only problem. Dr. Toby Sherwin, Marine Science Labs Menai
Bridge: "The generation of eddies in the Swellies is non-linear.
It requires only a small increase in the strength of the stream
to produce a disproportionately large increase in the size and
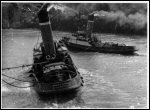
strength of the many eddies" It was approaching 10.20am.
With the increasingly turbulent stream and without a stern tug
the ship was sheering about wildly[12]. In barely 10
minutes, suddenly it would be all over.
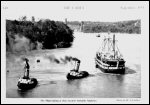
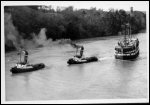
According to the Ship's Log at 10.09
am[12] the pilot boat secured herself to port (the
right side looking at the photos) to give extra power. Rather
like an ant pushing an elephant. However this time cannot be correct
as it was before the above sequence of events and the pilot boat
is clearly not alongside in any of the above photos. The pilot
boat must have come alongside at approximately 10.20am as the
photos taken after that time do show her in position.
|
--Previous Section | Introduction | Next
Section --
|
|